
Table of Contents
Imagine a dessert so beautifully plated that it looks straight out of a five-star restaurant. Now, picture a rich, crunchy, chocolatey topping sprinkled over it—adding texture, flavor, and a gourmet touch. That magic ingredient? Chocolate Soil Garnish!
This delicate, crumbly, and deeply flavorful chocolate element is a favorite among pastry chefs and dessert lovers alike. But here’s the best part—you don’t need to be a professional to make it at home! In this guide, we’ll take you step by step through everything you need to know about chocolate soil garnish, from its origins to the best ways to use it in your desserts.
What Is Chocolate Soil Garnish?
Chocolate soil garnish is a crumbly, crunchy mixture made from cocoa powder, sugar, and butter. It looks like finely crushed cookie crumbs but delivers an intense chocolate flavor with a slightly sandy texture. Some versions use melted chocolate, while others incorporate molecular gastronomy techniques to create even more exciting variations.
Why Do Chefs Love It?
- Enhances Texture – Adds a delightful crunch to soft desserts.
- Deepens Flavor – Intensifies the chocolate notes in any dish.
- Versatile – Works with cakes, ice cream, mousse, and even savory dishes!
- Elegant Presentation – Instantly makes desserts look more professional.
“A simple sprinkle of chocolate soil can transform an ordinary dessert into a masterpiece.” 🍫
If you love playing with textures in your desserts, this ingredient is an absolute must-try!
The Origins and Popularity of Chocolate Soil
You might be wondering—where did this concept come from? Chocolate soil garnish is a relatively modern culinary innovation, gaining popularity in fine dining and molecular gastronomy.
While classic dessert toppings like cookie crumbs and cocoa powder have existed for centuries, chocolate soil takes it a step further by balancing crunch, softness, and deep chocolate flavor in one bite. Top chefs started using it as a plating technique to elevate traditional desserts, and soon, it became a staple in high-end pastry kitchens.
Nowadays, home bakers and dessert enthusiasts are bringing this restaurant-style garnish into their own kitchens, making stunning creations with just a few simple ingredients.
Ingredients Needed for Chocolate Soil Garnish 🛒
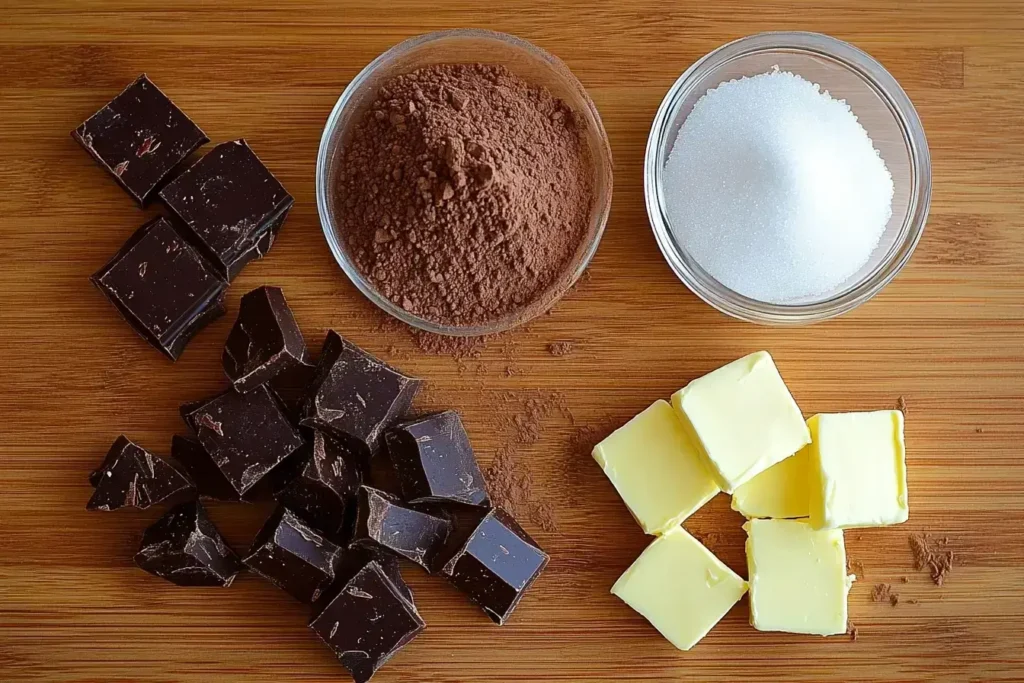
Making chocolate soil garnish at home is incredibly easy, and the best part? You only need a few simple ingredients—most of which you probably already have in your kitchen!
Choosing the Right Chocolate: Dark, Milk, or White?
The chocolate you choose will impact the final flavor and color of your chocolate soil.
- Dark Chocolate (70% cocoa or higher) – Creates an intense, slightly bitter taste and a deep brown color.
- Milk Chocolate – Results in a sweeter, creamier soil with a lighter shade.
- White Chocolate – A unique, buttery version with a caramelized sugar flavor when baked.
👉 Pro Tip: For the best results, use high-quality chocolate with minimal additives. The better the chocolate, the richer the flavor!
Essential Ingredients for the Perfect Texture
Here’s a basic list of what you’ll need:
- ½ cup (100g) granulated sugar – Helps create the classic “soil” texture.
- ¼ cup (30g) cocoa powder – Adds deep chocolate flavor.
- ¼ cup (50g) unsalted butter – Helps bind everything together.
- 1 tablespoon water – Creates steam, allowing the mixture to form crunchy granules.
Optional Additions for Extra Flavor:
- Pinch of sea salt – Enhances the chocolatey goodness.
- Vanilla extract – Adds warmth and depth.
- Espresso powder – Intensifies the cocoa flavor.
“A small pinch of salt can make your chocolate soil taste even richer!” 🌟
Common Problems and How to Fix Them
While chocolate soil garnish is easy to make, there are a few common issues that can pop up. Here’s how to fix them:
Why Is My Chocolate Soil Too Dry and Powdery?
If your soil turns out too dry, it means there isn’t enough butter or moisture in the mixture. Try adding:
- A tiny bit more melted butter.
- A few drops of water to help the sugar caramelize.
How to Fix Clumpy or Sticky Chocolate Soil?
If the chocolate soil is too sticky or clumpy, it might mean the sugar hasn’t cooked long enough. Try:
- Cooking it a little longer while stirring.
- Letting it cool completely before using it.
Ingredients You’ll Need
Basic Chocolate Soil Recipe
For this classic chocolate soil recipe, you’ll need:
- ½ cup (100g) granulated sugar
- ¼ cup (30g) unsweetened cocoa powder
- ¼ cup (50g) unsalted butter (cubed, at room temperature)
- 1 tablespoon water
Optional Ingredients for Extra Flavor
Want to add a unique twist to your chocolate soil? Try these variations:
- Pinch of sea salt – Enhances the chocolatey depth.
- 1 teaspoon vanilla extract – Adds warmth and aroma.
- ½ teaspoon espresso powder – Intensifies the cocoa flavor.
- ¼ teaspoon cinnamon or chili powder – Adds a subtle spice kick.
Step-by-Step Instructions to Make Chocolate Soil Garnish
1 – Prepare Your Cooking Station
Before starting, make sure you have:
- A non-stick frying pan or saucepan.
- A wooden spoon or silicone spatula for stirring.
- A baking tray lined with parchment paper (for cooling).
Having everything in place will save you time and avoid mess in the kitchen!
2 – Mix the Dry Ingredients
- In a bowl, whisk together the cocoa powder and sugar until fully combined.
- If using any extra ingredients like espresso powder or cinnamon, mix them in now.
3 – Cook the Mixture on Low Heat
- Place a non-stick pan over low heat.
- Add the butter and let it melt gently.
- Pour in the dry ingredients and stir continuously to coat them in the butter.
- Add the water, which helps create tiny chocolate granules.
- Keep stirring constantly for about 5-7 minutes.
“Low and slow is the key—cooking too fast can burn the sugar!” 🍳
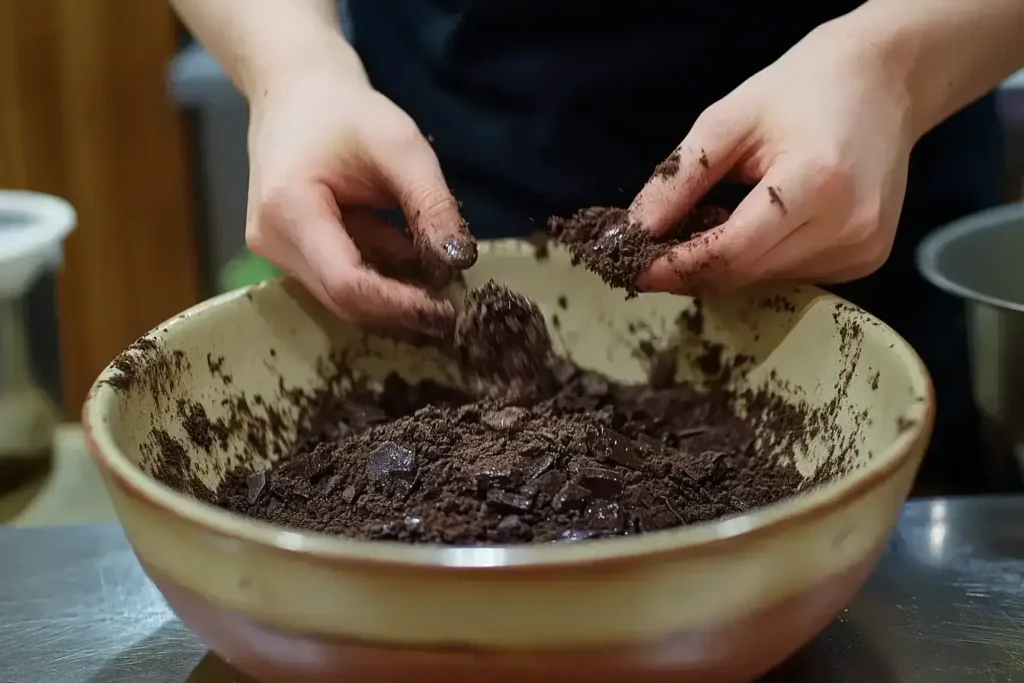
As the mixture cooks, you’ll notice small chocolate crumbs starting to form—this is exactly what you want!
4 – Check the Texture
After a few minutes, your chocolate mixture should look like crumbled cookie bits. It should feel light, sandy, and slightly crispy.
If it still looks too wet, keep cooking for 1-2 more minutes while stirring.
If it looks too dry, add a tiny splash of water to rehydrate the crumbs.
5 – Let It Cool
- Remove the pan from the heat and spread the chocolate soil onto the prepared baking tray.
- Let it cool at room temperature for 10-15 minutes.
- As it cools, it will become crunchier and more defined.
“Patience is key—letting it cool fully ensures the perfect texture!” 🌟
6 – Store or Use Immediately
Once cooled, your chocolate soil is ready to use! You can:
- Sprinkle it over cakes, ice cream, or desserts immediately for extra crunch.
- Store it in an airtight container at room temperature for up to one week.
- Freeze it for up to a month if you want to keep it fresh longer.
Advanced Techniques for Making Chocolate Soil Garnish
Want to take your chocolate soil to the next level? Here are some pro techniques used by professional chefs!
1. Using Melted Chocolate Instead of Cocoa Powder
For a richer, deeper chocolate flavor, you can use melted chocolate instead of cocoa powder.
- Melt 100g of dark chocolate over a double boiler.
- Pour it over ½ cup sugar and mix well.
- Let it cool until it forms small crunchy bits.
This version has a stronger chocolate taste and a slightly softer texture.
2. Molecular Gastronomy Technique
Want a more professional, restaurant-style texture? Try this:
- Use maltodextrin powder (a food additive that absorbs fats) instead of sugar.
- This creates a super fine, powdery chocolate soil used in fine dining restaurants!
It’s a bit more advanced, but worth it if you love experimenting in the kitchen!
Common Mistakes to Avoid
Even though this recipe is simple, mistakes can happen! Here are some quick fixes for common problems:
My Chocolate Soil Is Too Sticky!
- The heat might have been too high, causing the sugar to caramelize too much.
- Next time, use lower heat and stir constantly.
My Chocolate Soil Is Too Dry and Powdery!
- There might not be enough butter to bind the crumbs.
- Try adding a little more butter or a few drops of water.
The Sugar Burned!
- Stir constantly and use low heat to prevent burning.
- If it burns, you’ll need to start over—burnt chocolate has a bitter taste!
How to Use Chocolate Soil Garnish in Desserts 🍰
Now that you’ve mastered the art of making chocolate soil garnish, it’s time to get creative! This versatile topping can be used in so many delicious ways—from simple desserts like ice cream to elegant plated masterpieces.
In this section, we’ll explore fun and exciting ways to use chocolate soil, along with pro tips to make your desserts stand out!
“A sprinkle of chocolate soil is like the finishing touch on a masterpiece—it elevates every dessert to a whole new level!” ✨
Best Desserts to Pair with Chocolate Soil
1. Cakes & Cupcakes 🎂
Chocolate soil makes an amazing topping for cakes and cupcakes!
- Sprinkle it over frosted cupcakes for an elegant look.
- Use it as a textured layer in a layered cake for added crunch.
- Press it onto the sides of a chocolate cake for a crumb-coated effect.
👉 Pro Tip: Mix chocolate soil with crushed nuts (like hazelnuts or almonds) for a delicious, nutty crunch!
2. Ice Cream & Frozen Desserts 🍦
Want to take your ice cream game to the next level? Chocolate soil is perfect for frozen treats!
- Sprinkle it on top of vanilla or chocolate ice cream for a crunchy contrast.
- Layer it in a parfait or sundae for extra texture.
- Mix it into homemade ice cream before freezing for a surprise crunch.
👉 Pro Tip: Try toasting your chocolate soil in the oven for 5 minutes before using it—it enhances the flavor!
3. Mousses & Puddings 🍮
Soft and creamy desserts like mousse, pudding, and panna cotta pair beautifully with chocolate soil.
- Add a layer of chocolate soil at the bottom of a dessert cup before pouring in mousse or pudding.
- Use it as a topping for caramel or vanilla pudding for a rich contrast.
- Garnish chocolate mousse with whipped cream and a dusting of chocolate soil for a fancy touch.
👉 Pro Tip: Chill the chocolate soil before using—it helps keep its crunchy texture longer!
4. Cheesecakes 🧀🍫
Chocolate soil makes a fantastic crust alternative for cheesecakes!
- Instead of a graham cracker crust, press chocolate soil into the bottom of the pan.
- Use it as a crunchy topping on a baked or no-bake cheesecake.
- Combine it with melted butter to form a firm base for mini cheesecakes.
👉 Pro Tip: Pair chocolate soil with a raspberry or salted caramel cheesecake—the flavors work beautifully together!
5. Fine Dining & Plated Desserts 🍽️
If you want to plate desserts like a professional chef, chocolate soil is your best friend.
- Create a “dirt garden” effect by spreading it on a plate and placing small desserts on top.
- Use a fine sieve to dust chocolate soil in a controlled pattern for a fancy touch.
- Pair it with elements like fruit gels, caramel swirls, or edible flowers for an artistic presentation.
👉 Pro Tip: Chocolate soil works amazingly with passion fruit, mango, and berries—the acidity balances the rich cocoa flavor!
Unique & Unexpected Ways to Use Chocolate Soil
1. As a Topping for Pancakes & Waffles 🥞
Instead of syrup or powdered sugar, try sprinkling chocolate soil on your pancakes or waffles! It adds a rich chocolate flavor without making the dish too sweet.
- Pair with whipped cream and fresh berries for a delicious breakfast.
- Add a drizzle of melted chocolate or caramel for extra indulgence.
2. Mixed into Yogurt & Smoothie Bowls 🥣
Chocolate soil adds a delightful crunch to healthy snacks like yogurt bowls and smoothies.
- Sprinkle it over a Greek yogurt parfait for extra texture.
- Add it to a chocolate banana smoothie bowl for a crunchy contrast.
- Combine it with granola and nuts for a chocolatey breakfast mix.
👉 Pro Tip: Store chocolate soil in small jars and keep them in your pantry—it’s a great grab-and-go topping!
3. Pairing with Savory Dishes 🤯
Believe it or not, chocolate soil isn’t just for sweet dishes! Some chefs use it in savory recipes for a bold, unique touch.
- Sprinkle it over roasted beets or carrots for an earthy contrast.
- Use it as a topping for gourmet cheese plates—it pairs well with blue cheese and goat cheese!
- Combine it with spices like smoked paprika or chili powder for a spicy, savory twist.
👉 Pro Tip: If using chocolate soil in a savory dish, reduce the sugar slightly to balance the flavors!
Storing & Preserving Chocolate Soil for Future Use
If you’ve made a big batch of chocolate soil, don’t worry—it stores well! Here’s how to keep it fresh:
1. How to Store Chocolate Soil
- At room temperature: Store in an airtight container for up to one week.
- In the fridge: Keeps fresh for up to two weeks (but may lose some crunch).
- In the freezer: Can last for one month—just reheat slightly before using.
👉 Pro Tip: To revive stale chocolate soil, toast it in the oven at 300°F (150°C) for 3-5 minutes—it’ll crisp up again!
Conclusion :
Chocolate soil garnish is one of the easiest ways to make your desserts stand out. Whether you use it for cakes, ice cream, mousse, or even savory dishes, it adds an extra layer of flavor and texture that makes every bite exciting.
And the best part? It’s incredibly simple to make at home! With just a few ingredients and a little creativity, you can turn everyday desserts into gourmet masterpieces.
So, what are you waiting for? Try making chocolate soil today and take your dessert game to the next level! 🚀🍰
“Every great dessert deserves a little magic—chocolate soil is that secret ingredient!” 🌟
If you’re fascinated by this Chocolate Soil Garnish, you’ll love exploring more creative and decadent chocolate recipes! Try our rich and indulgent Chocolate Ganache Tart with Cherries—a stunning dessert with a velvety smooth texture. For a unique and crispy chocolate treat, check out our fun Chocolate Covered Potato Chips—the perfect balance of sweet and salty. And if you’re looking for a chewy and irresistible chocolate dessert, don’t miss our Double Chunk Chocolate Cookie—a must-try for all chocolate lovers! 🍫✨
Frequently Asked Questions (FAQs) About Chocolate Soil Garnish
If you’re new to chocolate soil garnish, you might have some questions about how to make it, what ingredients to use, and how to incorporate it into desserts. Here are some of the most common FAQs to help you master this delicious and versatile dessert topping!
What Can I Use to Make Edible Soil?
Edible soil can be made using a variety of sweet or savory ingredients, depending on the type of dish you’re preparing. For desserts, the best options include:
- Chocolate soil (made with cocoa powder, sugar, and butter)
- Crushed cookies (like Oreos, graham crackers, or digestive biscuits)
- Cake crumbs (dried and crumbled for a soft texture)
- Brownie crumbs (for a fudgy, rich flavor)
- Ground nuts (like almonds or hazelnuts for a nutty crunch)
If you’re making a savory edible soil, try using:
- Toasted breadcrumbs (seasoned with herbs and spices)
- Ground black olives (for a salty, earthy flavor)
- Blended mushrooms or nuts (for an umami-rich soil effect)
“Chocolate soil is one of the easiest and most delicious types of edible soil for desserts!” 🍫
What Is Chocolate Crumb Made Of?
Chocolate crumb, also known as chocolate soil, is typically made with:
- Granulated sugar (creates the crumbly texture)
- Unsweetened cocoa powder (adds deep chocolate flavor)
- Unsalted butter (binds the ingredients together)
- A small amount of water (helps with texture formation)
Some variations use melted chocolate instead of cocoa powder for a richer, more intense chocolate taste. You can also add vanilla, espresso powder, or spices to enhance the flavor.
“Chocolate crumb is basically crispy, chocolate-flavored crumbs that add texture and flavor to desserts!” 🍩
How to Make Garnish Chocolate?
If you want to create chocolate garnishes beyond chocolate soil, here are some popular techniques:
- Chocolate Shavings – Use a vegetable peeler or knife to scrape thin curls from a chocolate bar.
- Chocolate Drizzles – Melt chocolate and drizzle it over desserts using a spoon or piping bag.
- Chocolate Chips or Chunks – Chop a chocolate bar into small pieces for an uneven, rustic garnish.
- Chocolate Curls – Spread melted chocolate thinly, let it cool slightly, then scrape it into curls with a spatula.
- Chocolate Dust – Grate chocolate finely or blend it into a powder for a light, dusted effect.
If you’re looking for a crunchy chocolate garnish, chocolate soil is one of the best choices! It adds texture, flavor, and a professional touch to any dessert.
“From shavings to drizzles, chocolate garnish comes in many forms—experiment and find your favorite!” 🍫✨
How to Make Edible Dirt for Cake Decorating?
Creating edible dirt for cake decorating is easy and fun! Depending on the look and taste you want, here are some great options:
- Chocolate Soil – Crumbly and crunchy, perfect for textured cake toppings.
- Crushed Chocolate Cookies – Oreos or chocolate wafers make excellent edible dirt.
- Brown Sugar & Cocoa Powder Mix – A soft, sandy-textured dirt alternative.
- Ground Nuts & Cocoa – Adds a nutty, earthy flavor to your cake decorations.
Steps to Use Chocolate Soil for Cake Decorating:
- Prepare the cake surface – Spread frosting or ganache so the crumbs stick well.
- Sprinkle chocolate soil – Gently press it into the frosting for a realistic soil effect.
- Add decorations – Use edible flowers, gummy worms, or fondant decorations to create a fun garden or nature-themed cake!
“Edible dirt is a fun and easy way to give your cakes a unique, realistic look!” 🎂
1 thought on “Chocolate Soil Garnish Explained: A Simple Yet Stunning Touch on 2025!”